Build a Raspberry Pi-powered MIDI Synth
The Roland MT-32 Multi-Timbre Sound Module had 128 unique sounds and you could play up to nine parts at once (8 melodic instruments plus 1 rhythm instrument). Although not originally designed with gamers in mind, it was adopted by game developers (such as Sierra On-Line), and as a result, it opened up a wide world of musical experiences for computers in the late 1980s and well into the following decade.
For what it offered, the MT-32 was somewhat affordable (around $700 when in 1987), but a little pricey for many gamers. Roland eventually released less-expensive versions aimed at gamers, but eventually, a more open standard (General MIDI) emerged that became a core part of the video gaming landscape. As sound cards began to implement MIDI functionality, there was no need for a separate synth module.
In a time when the audio coming out of your computer wasn’t all that impressive, a MIDI synthesizer could completely change your experience of a game. The Atari ST included MIDI ports, but no built-in synthesizer, and its Yamaha YM2149 sound chip was not exactly designed for high fidelity sound. So, if you want to use one of the many great MIDI sequencers for Atari ST, or play a MIDI-compatible game the way it was meant to be experienced, you’ll need a synthesizer.
The mt32-pi project turns a Raspberry Pi into a MIDI synthesizer that can emulate the MT-32 and other synthesizers, and also supports General MIDI. It’s referred to as a baremetal synthesizer because the mt32-pi software runs directly on the Raspberry Pi hardware, without an operating system (in other words, it runs directly on the metal of the underlying computing hardware).
The clumsyMIDI Expansion Board
While the mt32-pi project provides the software, and a Raspberry Pi (Raspberry Pi 3, 4, or Zero 2 W) provides the underlying hardware, you still need some additional hardware to make it all work. Raspberry Pi Hats are expansion modules that add hardware capabilities to a Raspberry Pi. I wasn’t able to find a ready-made MIDI Hat for sale, though you can occasionally find them in stock, such as this Pi Hat available on Tindie. However, there is one you can build yourself, the clumsyMIDI.
To build a clumsyMIDI, you need basic soldering skills. The clumsyMIDI requires only through-hole soldering, so you won’t have to do any surface mount work. You will need a little patience, though, because you will have to order the boards from a PCB manufacturer. The designers of clumsyMIDI offer instructions on obtaining the PCB, and they provide a link there to order the PCB from PCBWAY. I placed an order for five boards, which cost $US 12 shipped. It took about 16 days from placing the order to receiving the boards.

In addition to the board, you’ll need some commonly-available electronic components. Check out the bill of materials (BoM) in the clumsyMIDI github repository for exact part numbers. Here’s what I went with:
- One PCM5102 I2S Digital-to-Analog converter. You want this for the highest possible quality audio output.
- One I2C SSD1306 OLED Display. mt32-pi will use this to display useful information, including an EQ-style display of each MIDI channel.
- One each 470 uF and 100 uF electrolytic capacitors. You could buy them individually or in an assortment such as the E-Projects Radial Electrolytic Capacitor Kit. I haven’t bought that exact kit, but I have bought a capacitor kit from E-Projects in the past.
- Four 0.1 uF ceramic capacitors. Listed as 100 nF in the BoM (100 nF = 0.1 uF).
- One 1N4148 diode.
- Two MIDI jacks.
- Assorted male and female breakaway headers (2.54mm pin spacing). These are pretty common, but you can’t go wrong with these female and male headers from Adafruit. The clumsyMIDI BoM specifies a Raspberry Pi GPIO socket, but I just used two rows of 20 female header pins.
- Five 220 Ω (red-red-brown) and one 1 kΩ (brown-black-red) resistor. These are extremely common resistor values. An assortment of 1/4 watt resistors such as this one from E-Projects should give you everything you need.
- One 74HCT14 hex inverter Schmitt trigger and a 14-pin socket for it.
- One H11L1M optocoupler and a 6-pin socket for it.
When you buy through a link on this site, I may earn a commission.
Build It
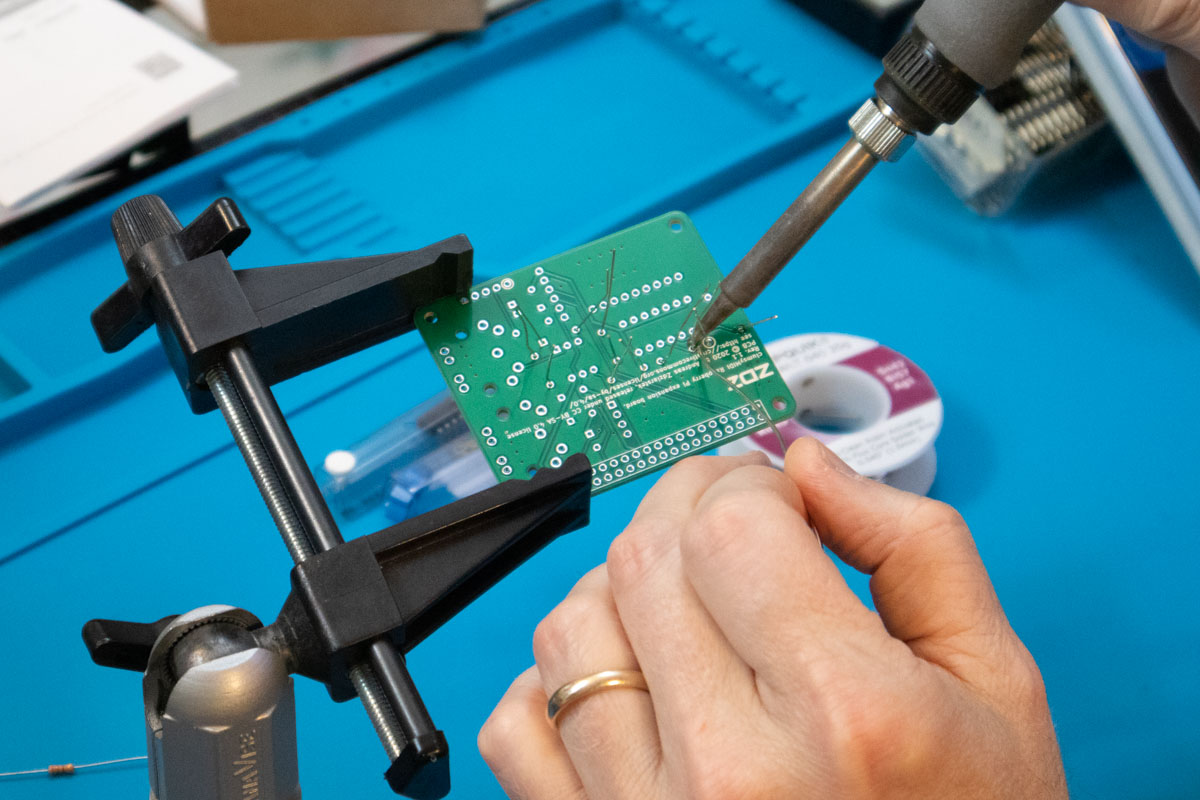
The soldering for this board is pretty simple. I started with the lowest profile components (the resistors and diode), and worked my way up. There were some components, such as the integrated circuit sockets, where it was more convenient to flip the board over onto a work surface with the components in place, rather than trying to hold them in place while the board was in my vise. Here’s the PCB with all but one resistor placed:

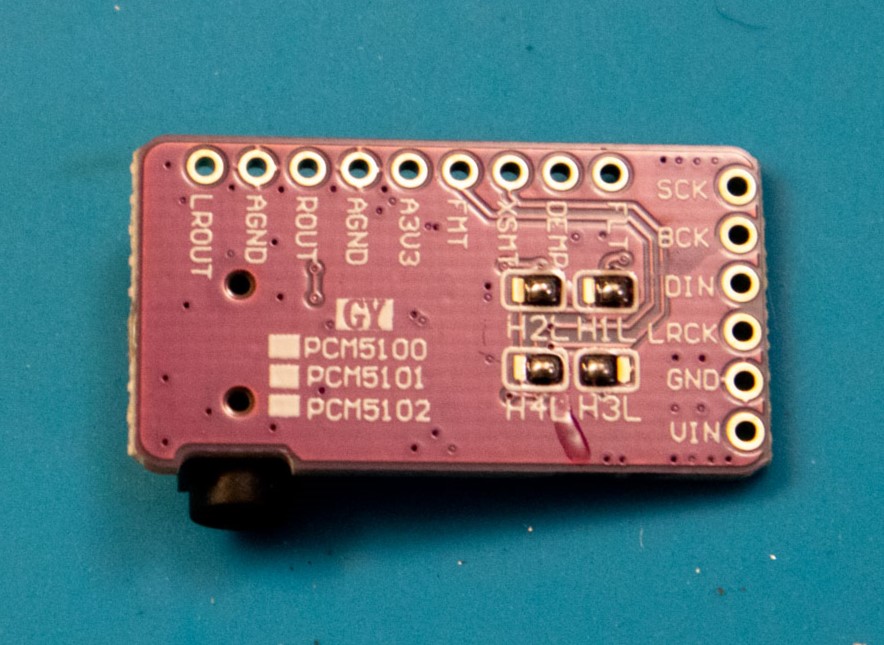
Before you solder on the PCM5102, turn it over and make sure the solder bridges are configured as shown in the following image. If they are not, resolder them to match the image. See the clumsyMIDI documentation for more details.
After you’ve soldered on all the components, you’ll need to solder on the GPIO header. I placed two rows of 20 female breakaway headers on a Raspberry Pi and used that as a jig for soldering the headers onto the clumsyMIDI board:

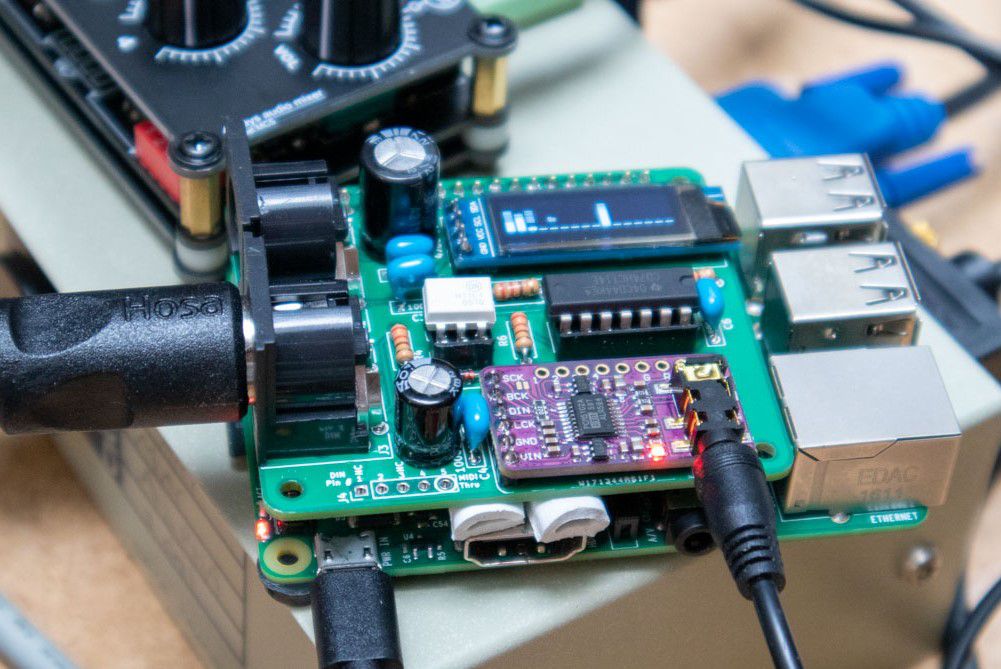
You will want to put some insulating material between the clumsyMIDI and the Raspberry Pi’s HDMI port, as shown in this picture of the finished board:
Now that you’ve built the clumsyMIDI board, head on over to the mt32-pi wiki and follow the instructions for installation, paying particular attention to the configuration file, SD card preparation, and the recommended SoundFonts, which implement General MIDI instruments and work well with a lot of games. If you decide to go down the road of emulating the original MT-32, you’ll need to locate and install the ROMs from a real MT-32, which is complicated, both technically and legally.
For my mt32-pi, I made the following changes to the default configuration:
- Changed
default_synth = mt32todefault_synth = soundfont. There’s one SoundFont installed by default, and you can put more in the soundfonts/ directory. You can change which SoundFont to use by changing thesoundfont = 0setting. The SoundFonts are numbered sequentially from 0 and in alphabetical order of their filenames. - Changed
usb = ontousb = offbecause I wasn’t using any USB devices. - Changed
output_device = pwmtooutput_device = i2sto use the DAC for audio output. - Changed
i2c_dac_init = nonetoi2c_dac_init = pcm51xxto use the DAC that I installed. - In the
[lcd]section, I changedtype = nonetotype = ssd1306_i2c.
You’ll just need to connect your Atari ST’s MIDI out to the clumsyMIDI’s MIDI in, power them both up, and if all is well, you should be able to use MIDI-enabled software. A short MIDI cable, such as the ones in this 2-pack, is all you need to make the connection.
Here’s a short clip of Ultima IV on an Atari ST, first with music from the Atari ST sound chip. It doesn’t sound all that bad, at least not until I bring in the MIDI audio. While both are playing, you can hear a lot of dissonance. At the end of the clip, I let the MIDI audio play (in all its glory). It’s quite an improvement over the original Atari ST audio!
You can do more than just play games, too. The mt32-pi is a capable synthesizer that you can use with MIDI sequencers such as Cubase, Notator, and others. It can be a little tricky to obtain working versions of old commercial software (and for Notator, you need a copyright protection dongle). Sweet Sixteen is an excellent MIDI sequencer, and it has been made available as freeware. You can learn more and download it here. You can learn a bit more about Sweet Sixteen in these articles from Music Technology via mu:zines and Sound On Sound.
See Also
- List of MT-32-compatible computer games
- DOS games with General MIDI support
- Atari Forum discussion about ST games with MIDI sound
- Scans of Sweet Sixteen documentation
Tagged atari-st, midi, raspberry-pi